Shrimp Tempura Sushi Roll (Crispy, Restaurant-Style at Home)
Make crispy, restaurant-quality shrimp tempura sushi rolls at home with golden fried shrimp, seasoned sushi rice, and fresh fillings. This step-by-step recipe is easier than you think!

The Crispy Sushi Roll You Have Been Dreaming About
There is something almost magical about a perfectly made shrimp tempura sushi roll. That satisfying contrast between the golden, shatteringly crisp fried shrimp and the cool, vinegared rice wrapped in toasted nori is the kind of thing that keeps you coming back to your favorite Japanese restaurant week after week. But here is a little secret: you can absolutely nail that same tempura aesthetic right in your own kitchen, and it is far more achievable than it looks.
This recipe delivers the full experience of a crispy seafood sushi roll with juicy butterflied shrimp, creamy avocado, fresh cucumber, and a drizzle of spicy mayo that ties everything together beautifully. Whether you are chasing a classic dynamite roll with tempura shrimp or just want a stunning fried shrimp sushi meal for a weekend dinner, this guide walks you through every step with confidence.
Having the right tools genuinely transforms your sushi-making experience. A proper bamboo rolling mat keeps your rolls tight and uniform, and a reliable kitchen thermometer takes the guesswork out of frying shrimp to that perfect golden crisp.
Why This Fried Shrimp Sushi Roll Works So Well
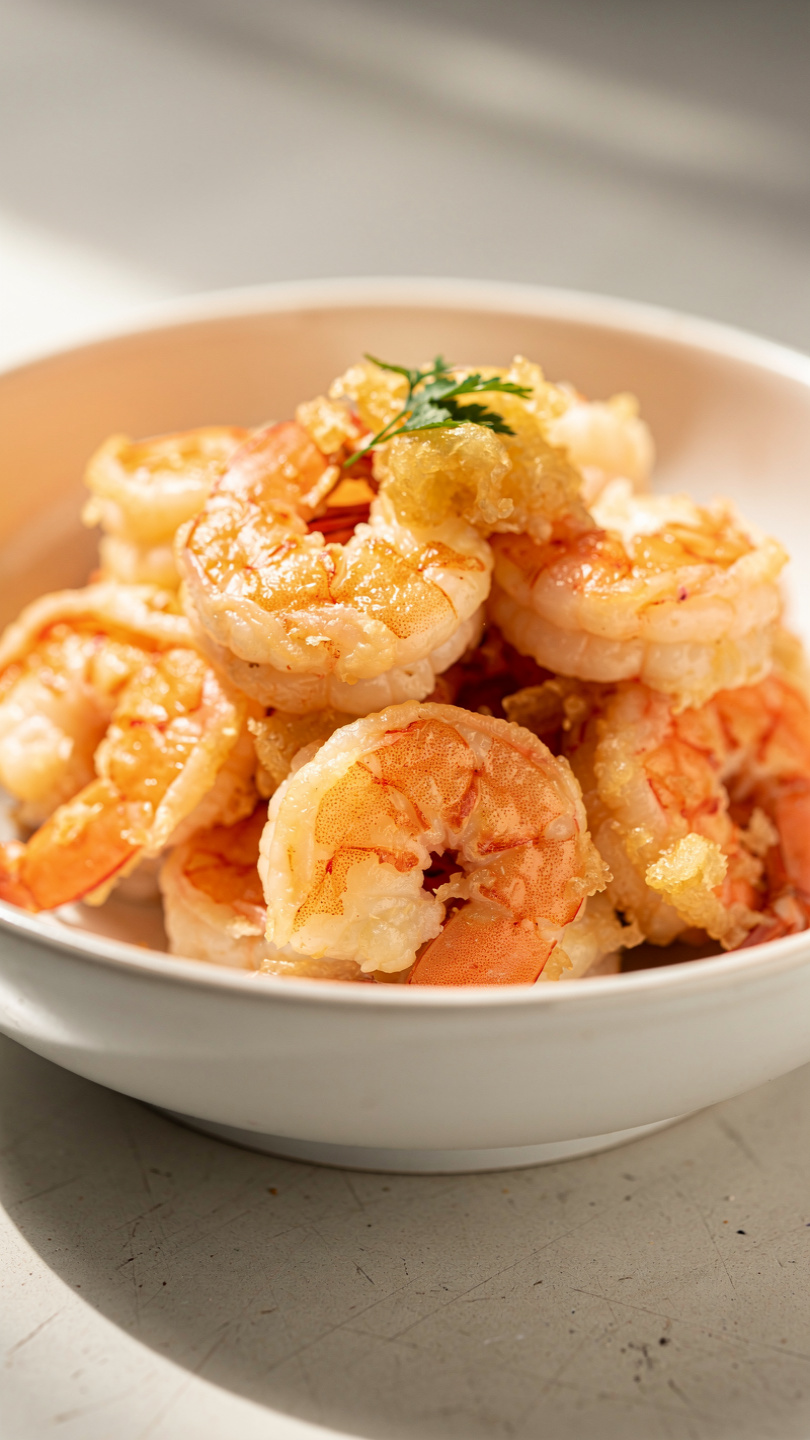
A lot of homemade sushi attempts fall flat for one of two reasons: the rice is wrong, or the shrimp is soggy. This recipe solves both problems head-on.
Getting the rice right is everything. Properly seasoned sushi rice should be slightly sticky, gently sweet, and just a little tangy from the rice vinegar. It should hold its shape when pressed but never feel gummy. The trick is to fold in the vinegar mixture while the rice is still steaming hot and fan it as you go.
Getting the shrimp crispy comes down to three things:
- Your batter must be ice-cold to create that light, airy tempura texture
- Your oil must be at a steady 350 degrees F before the shrimp go in
- You must fry in small batches so the oil temperature does not drop
Chef's Tip: Mix your tempura batter in a bowl set inside a larger bowl of ice water. A few lumps in the batter are perfectly fine and actually desirable. Overmixing develops gluten and produces a thick, doughy coating instead of that delicate crispy shrimp sushi crunch.
Building Your Roll Like a Pro
Once your shrimp are fried and your rice is cooled, the assembly is surprisingly fast. A few pointers that make a real difference:
- Wet your hands before handling sushi rice. It prevents sticking and makes spreading the rice smooth and even.
- Do not overload the filling. It is tempting to pile everything in, but a tight, controlled roll slices cleanly and holds together on the plate.
- Use a sharp, wet knife for slicing. Wipe the blade between each cut for those clean, restaurant-worthy pieces.
For a dynamite roll with tempura shrimp, simply add a thin strip of softened cream cheese and a touch of sriracha mayo alongside the shrimp before rolling. It adds a rich, spicy creaminess that tastes incredible against the crunch of the fried shrimp sushi roll.
You can also flip the roll inside-out (uramaki style) by spreading the rice on the nori, flipping it over onto the plastic-wrapped mat, and placing your fillings on the exposed nori side. Finish with a roll in sesame seeds for a stunning presentation.
Note: Butterfly your shrimp before frying by slicing lengthwise almost all the way through and pressing them flat. This keeps them long and straight so they lay perfectly across the roll without bunching.
Ready to bring that restaurant-style crispy seafood sushi roll to your table? Here is the complete recipe:
Shrimp Tempura Sushi Roll (Crispy, Restaurant-Style at Home)
Make crispy, restaurant-quality shrimp tempura sushi rolls at home with golden fried shrimp, seasoned sushi rice, and fresh fillings. This step-by-step recipe is easier than you think!
Ingredients
- 2 cups sushi rice, uncooked, short-grain
- 2 1/2 cups water, for cooking the rice
- 3 tbsp rice vinegar, for seasoning the rice
- 1 tbsp sugar, for seasoning the rice
- 1 tsp salt, for seasoning the rice
- 16 large shrimp, peeled and deveined, tails removed
- 1/2 cup all-purpose flour, for dredging
- 1 cup tempura batter mix, prepared according to package directions with ice-cold water
- 3/4 cup ice-cold water, for mixing into tempura batter
- 3 cups vegetable oil, for deep frying
- 4 nori sheets, full size, toasted
- 1 Persian cucumber, julienned into thin strips
- 1 avocado, ripe, sliced thin
- 4 oz cream cheese, softened, optional for a dynamite roll variation
- 3 tbsp spicy mayo, for drizzling; mix mayo with sriracha to taste
- 2 tbsp soy sauce, for serving
- 1 tbsp sesame seeds, toasted, for garnish
- 2 tbsp pickled ginger, for serving
Instruction
Rinse the sushi rice under cold water until the water runs clear, then cook it with 2.5 cups of water in a rice cooker or on the stovetop according to package directions.
While the rice is still hot, combine the rice vinegar, sugar, and salt in a small bowl and stir until dissolved. Fold this mixture gently into the cooked rice using a wooden paddle or spatula. Fan the rice as you fold to cool it to room temperature. Do not refrigerate.
Butterfly each shrimp by slicing lengthwise almost all the way through and pressing flat. This helps them stay straight and long for rolling.
Set up a frying station: heat the vegetable oil in a deep pot or wok to 350 degrees F (175 degrees C). Prepare three stations: a plate of flour, the tempura batter, and a wire rack lined with paper towels.
Dredge each shrimp lightly in flour, shake off the excess, then dip into the ice-cold tempura batter. Fry in batches of 4 to 5 shrimp for 2 to 3 minutes until golden and crispy. Transfer to the wire rack. Do not overcrowd the oil.
Place a bamboo sushi mat on a clean surface and cover it with plastic wrap. Lay one nori sheet shiny-side down on the mat.
With wet hands, spread about half a cup of seasoned rice evenly over the nori, leaving a 1-inch border at the top edge.
Arrange 4 tempura shrimp horizontally across the lower third of the rice. Add a few strips of cucumber and avocado alongside the shrimp. Add a thin line of cream cheese if using.
Using the bamboo mat, roll the sushi tightly from the bottom, pressing gently but firmly as you roll. Seal the edge with a little water on the exposed nori border.
Slice each roll into 8 pieces using a sharp, wet knife. Wipe the blade between cuts for clean slices.
Drizzle with spicy mayo, sprinkle with toasted sesame seeds, and serve immediately with soy sauce and pickled ginger on the side.
Equipment
- Bamboo sushi rolling mat
- Plastic wrap
- Deep pot or wok for frying
- Instant-read or candy thermometer
- Wire rack with paper towels
- Rice cooker or medium saucepan with lid
- Sharp chef's knife
- Wooden rice paddle or spatula
- Small mixing bowls
Notes
Serving and Storing Your Shrimp Tempura Sushi
Shrimp tempura sushi rolls are at their absolute best the moment they are sliced. Arrange them on a plate with small bowls of soy sauce and pickled ginger on the side, and finish with a generous drizzle of spicy mayo and a scatter of toasted sesame seeds.
For a complete fried shrimp sushi meal, serve alongside a light miso soup, edamame with sea salt, or a simple seaweed salad.
If you have leftovers, keep the components separate whenever possible. The shrimp can be re-crisped in an air fryer, and assembled rolls can be stored in the fridge for up to one day, though they are best eaten fresh. Once you make this recipe once, it will absolutely become a regular rotation in your kitchen.